How to Set Up
Setting Up Organizations For The First Time
Are you ready to set up your organization for a gift of appreciation with the Appreciation Company? This guide will show you how it’s done. This is really quite simple, it only takes a few minutes, and we’ve included quite a bit of detail to ensure we do everything right the first time.

Setting Up a New Organization Involves 3 Steps
Step — 01
Import
Recipients
Recipients are the staff, volunteers, employees, or partners who will be recognized and appreciated by contributors.

Step — 02
Create Appreciation Groups
Create Appreciation Groups and send communications to the Recipients.

Step — 03
Invite
Contributors
Contributors are the parents or guardians of the students, players, performers, etc. that will recognize the Recipients.
Video Walkthrough
Preparatory Steps
To use the Appreciation Company as an organization, you must first designate an administrator. This person will have login access to our Administrator Console (Admin for short). This is where Appreciations are created and managed. Staff information can also be verified and edited here.
Note: If the individual designated as the organization administrator could also be a contributor or recipient of a gift of appreciation in the future, use a different email address for separate logins for that person. For example:
- name@example.com – use this for Admin Console access.
- example@gmail.com – use for contributor and recipient login.
Document Your Groupings
Each organization we work with has natural groupings. Some examples are classrooms at schools, teams for sports leagues, camps at the YMCA. Also, groupings might be different levels of skill, like pre-ballet, ballet 1, or ballet 2, when classes are mixed across instructors. Groupings can contain sub-groups. For example, your school or sports league has admins and support staff. You can recognize those individuals, too. It can be helpful to create an admin group that is included in the appreciation for each classroom at a school.
Groupings are key to simplifying our approach together because we’ll create Appreciations by grouping and then send communications to the contributors by grouping.
For example, all the parents for one classroom in a school would receive the same communication that has a link to the Appreciation. This appreciation contains all the individual recipients in the grouping such as the teacher(s), assistant(s) and support staff.
Document your groupings using the names that are most relevant to you. Each Recipient in your organization must be a part of a grouping.
Importing Recipients
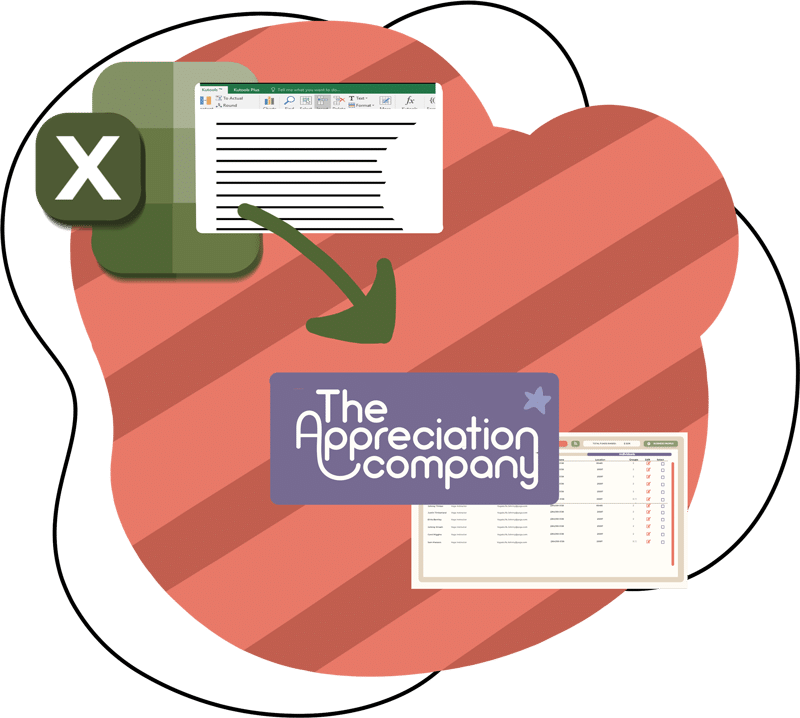
Recipients are your staff that will receive a gift of appreciation from contributors. We’ll set up Recipients now. To make the process as frustration-free as possible, the Appreciation Company uses a template for Recipients. We simply ask that you complete the template and email to us. We’ll verify as much as we can (such as Grouping names) and do all of the import work for you.
Recipient Privacy
Below is the Recipient information collected and how it is handled regarding privacy. All fields are required.
SPI = Sensitive Personal Information is handled in a secure manner.
| Field | Purpose | Private or Public (and how) |
|---|---|---|
| First Name | Identity | Public – Name is shared with Contributors for identification purposes. |
| Last Name | Identity | Public – Name is shared with Contributors for identification purposes. |
| Login & communications | Private – SPI | |
| Mobile Phone | Login & communications | Private – SPI |
| Postal Code | Tax accounting Purposes | Private – SPI |
| Role | Identity | Public – Name is shared with Contributors for identification purposes. |
| Grouping 1 (2, 3 etc.) | Creating Appreciation Events and Communications to Contributors by Grouping | Public – Groupings are used for creating, organizing, and communicating a gift of appreciation. You can have as many groupings as you want and we can include a group within a group. Ex: admins group can be added to each classroom group. |
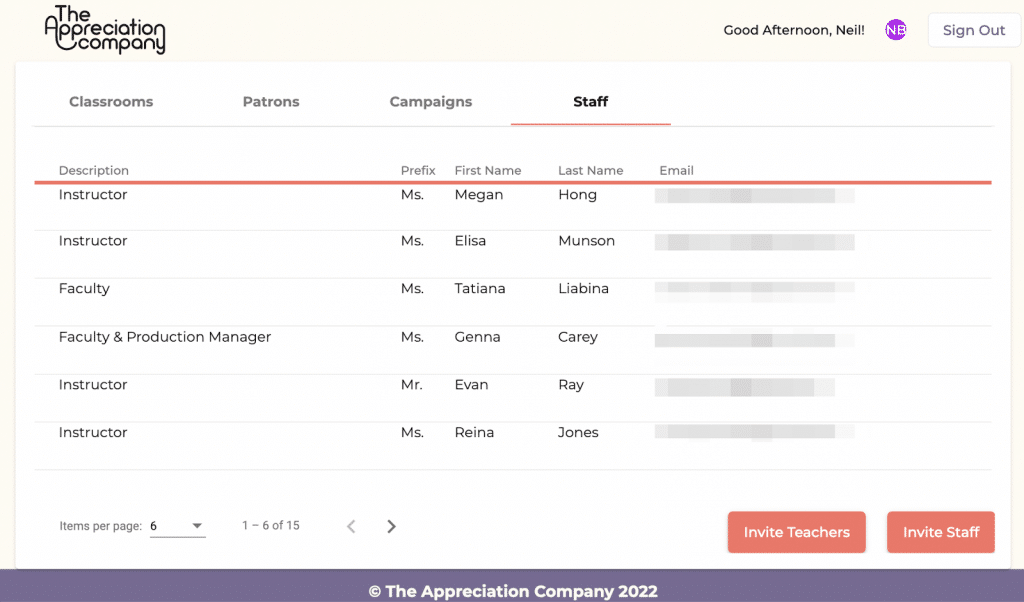
Here is what an example organization looks like in the Admin interface after recipients have been imported. Recipients are listed on the Staff tab.
Now that Recipients have been loaded and verified by your team in The Appreciation Company Admin Console, it’s time to start creating Appreciations for your recipients. We’ll use your organization’s groupings for this.
Creating Appreciations
Organizing a new Appreciation only takes a minute or two each. You’ll create a new Appreciation Event for each grouping in your organization.
There are 3 easy action steps to follow:
- Name and date
- Recipients
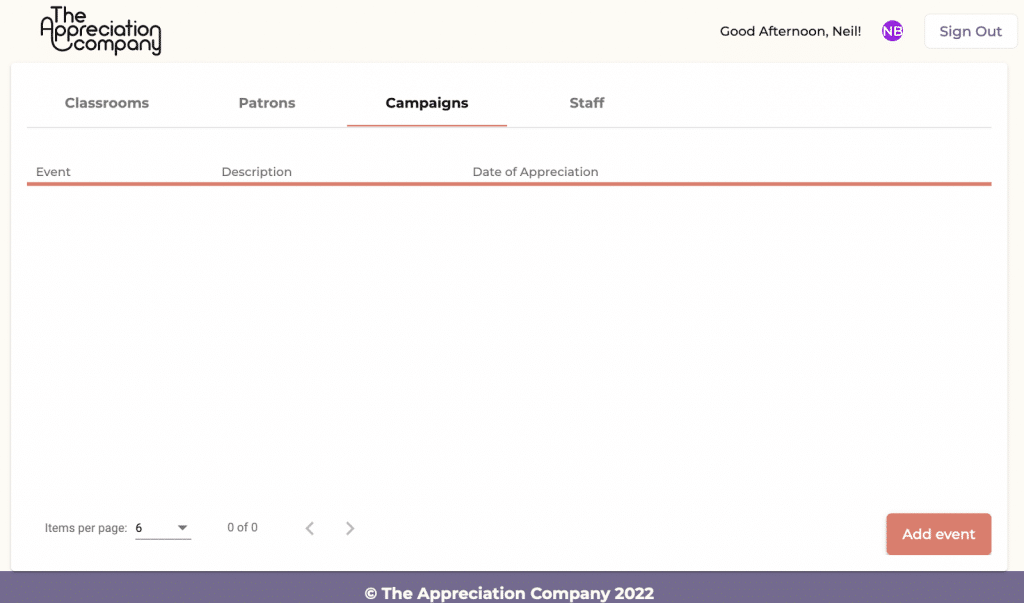
Start by clicking on the Campaigns Tab. It will probably be blank with an “Add event” button in the lower right of your screen.
Click “Add Event” to begin creating your Appreciations.
Step — 01
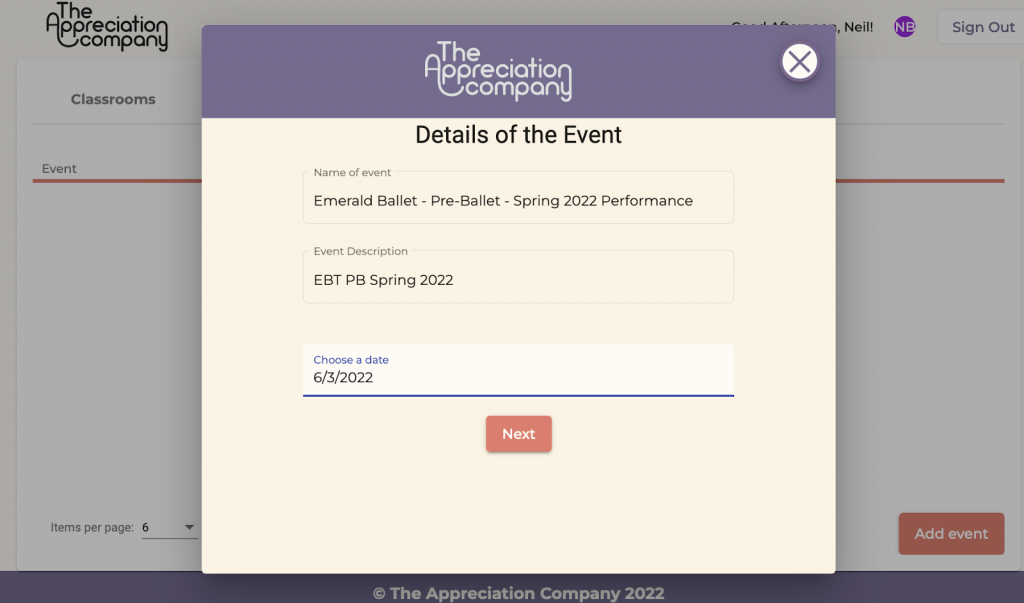
Name Your Appreciation & Set a Date
Based on the groupings you documented for your Recipient list, Type a name that is easy for contributors to identify with. A consistent rule we have found is:
Organization + Grouping + Timing or Milestone
For example:
- Lake Washington Soccer – Blue Thunder – Fall 2022
- Emerald Ballet – Pre-Ballet – Spring 2022 Performance
- Sandburg Elementary – Ms Brown, 2nd Grade – Teacher Appreciation Week 2022
Note: The name of the Appreciation and date can be used in a text or email template generated in Step 3.
Once your details are set, click “Next.”
Step — 02
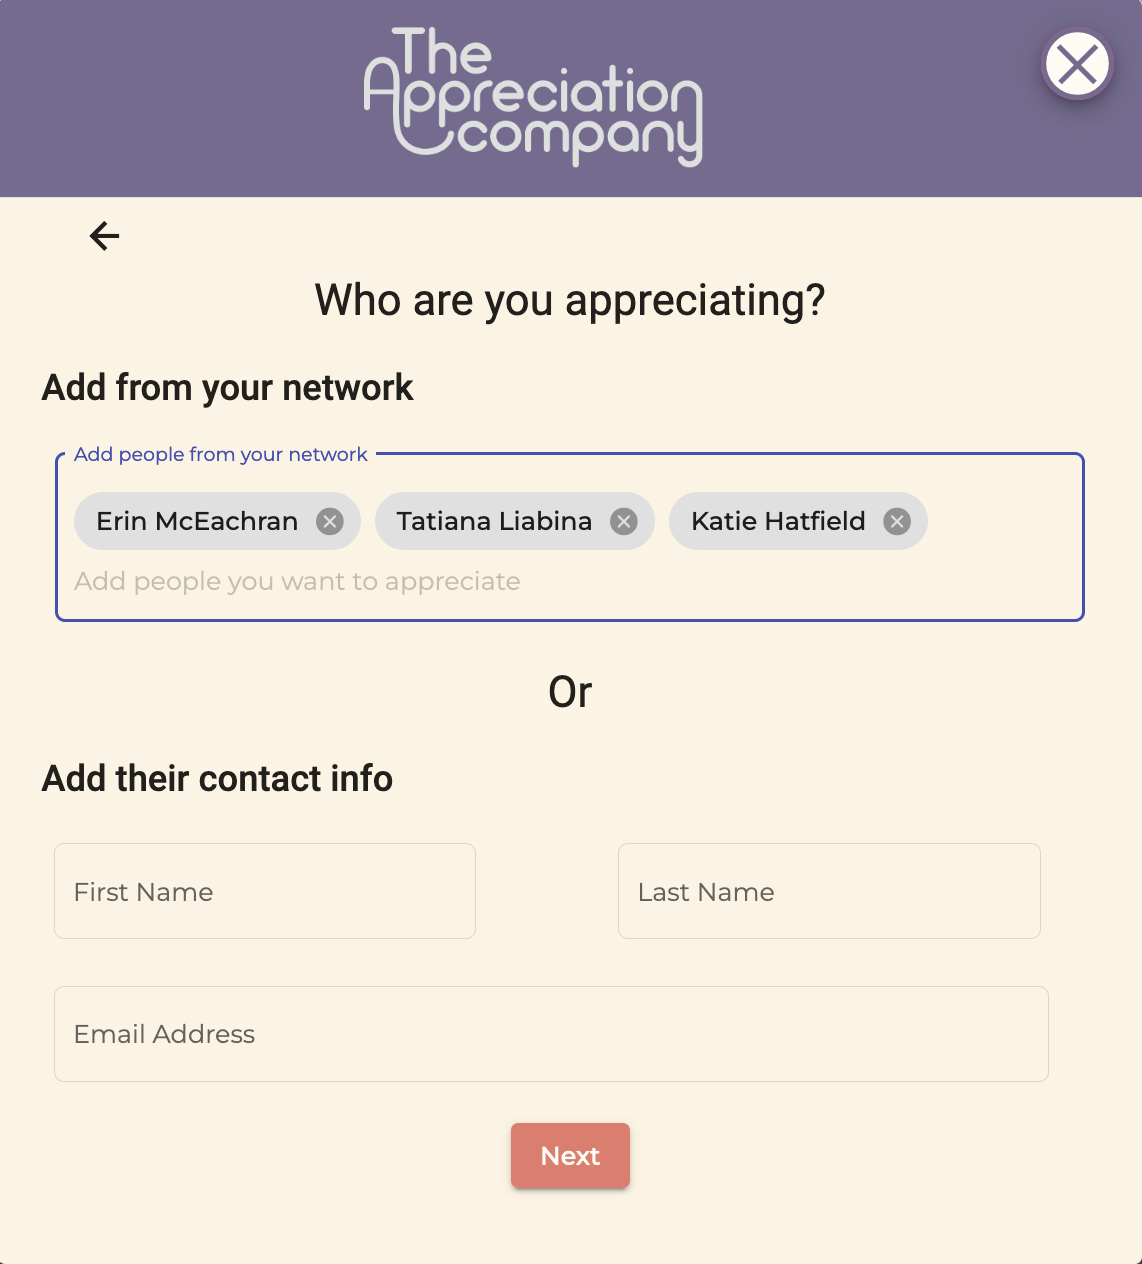
Add the Recipient of the Appreciation for this Grouping
You have two choices at this point:
- Add Recipients that were just imported and verified (preferred method) OR
- Add someone new to your organization. Ideally, you are only using the recipients just imported
This is where the definition of the groupings in Step 1 are important. We’ll create Appreciation Events based on the correct groupings.
Once you’ve finished adding Recipients, click “Next.”
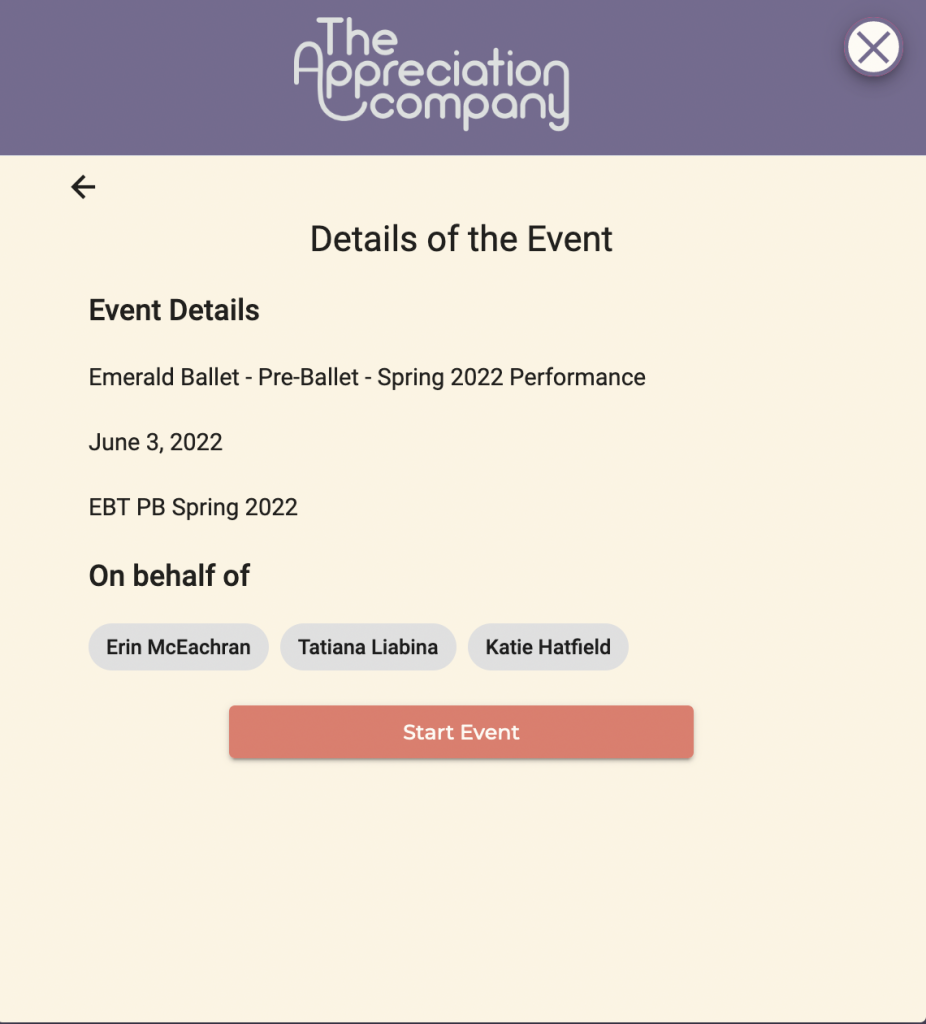
Verify the details of the Appreciation.
Hit the back arrow in the top left corner if you need to make any corrections.
If everything looks good, click “Start Event.”
Congrats—you have created your Appreciation! At this point, you can click “Start Event” and create more Appreciations for your organization.
Repeat the steps above to create additional Appreciations for the groupings of your organization (by classroom, team, performance, etc.).
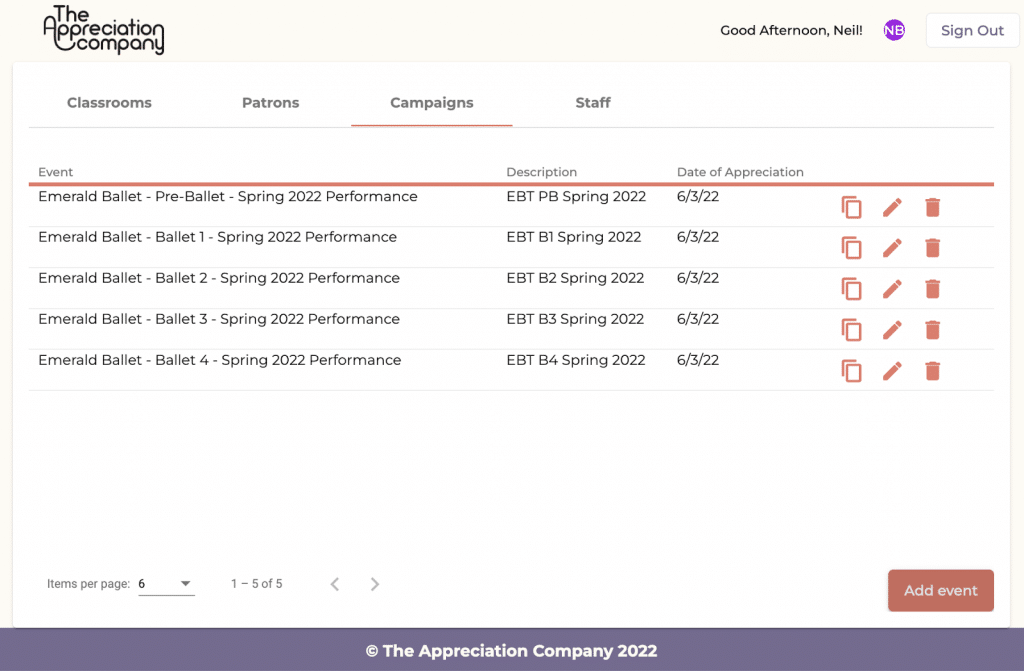
Once you have created all of your Appreciations, your screen should look something like the following. Note the pagination in the lower-left corner of the screen. You might have more than what will fit on one page.
Please note the action buttons in the columns on the far right. These actions are:
- Copy the Appreciation Link: used for inviting contributors to the Appreciation. We like to copy this link into an email template.
- Edit the Appreciation: use if you need to edit the details of an Appreciation.
- Delete the Appreciation: only do this if you have NOT invited contributors—they may reach a dead link.
Step — 03
Invite Contributors to Support a Gift of Appreciation
To help you manage communications, we’ve created a spreadsheet with two columns that looks like this example. This table is helpful for organizing and sending invitations to your contributors.
Next, create an email template (see below for an example) and invite your contributors using the associated Appreciation links.
Extra tips for success: We recommend reminding the contributors a few days before, the day of, and perhaps even a day after the Appreciation. (You can still contribute to an Appreciation even if you’re late).
Don’t forget to set a reminder and let your recipients know they have an Appreciation waiting for them. All they have to do is sign up and log in using the email address you set in Step 1.
| Appreciation Name | Appreciation Link |
|---|---|
| Pre ballet | Link for PB |
| Ballet 1 | Link for B1 |
| Ballet 2 | Link for B2 |
| Ballet 3 | Link for B3 |
| Ballet 4 | Link for B4 |
Optional
The Appreciation Company Communicates with Contributors
If you have arranged for The Appreciation Company to invite your contributors to Appreciations on behalf of your organization, then we’ll need the list of Contributors.
We want to make inviting Contributors as easy as importing Recipients. The structure is almost exactly the same with one exception: Contributors don’t have a “Role” that must be identified. However, we do need Groupings!
Contributor Privacy
Note: Grouping Names for the Recipient and Contributor tables must match. Don’t worry, we’ll verify this before importing.
| Field | Purpose | Private or Public (and how) |
|---|---|---|
| First Name | Identity | Public – Name is shared with Contributors for identification purposes. |
| Last Name | Identity | Public – Name is shared with Contributors for identification purposes. |
| Login & communications | Private – SPI | |
| Mobile Phone | Login & communications | Private – SPI |
| Postal Code | Tax accounting Purposes | Private – SPI |
| Grouping 1 (2 & 3) | Platform Structure | Public – Groupings are used for creating, organizing, and communicating Appreciations. |
